Your Ultimate 10-Point Website Redesign Checklist for 2025

Embarking on a website redesign is a significant undertaking that can either catapult your business forward or become a costly, resource-draining misstep. The difference between a successful relaunch and a frustrating failure often lies in meticulous planning and a structured, methodical execution. A poorly managed project can lead to broken user journeys, lost SEO rankings, and a final product that fails to meet business objectives.
For startups, SMEs, and product teams, especially those engaging a development partner or nearshore augmentation, a clear, actionable roadmap is not just helpful; it's essential for aligning teams, managing scope, and ensuring a positive return on investment. This is where a comprehensive website redesign checklist becomes your most valuable asset. It transforms an overwhelming endeavor into a series of manageable, sequential steps, preventing critical tasks from falling through the cracks.
This guide provides that exact roadmap. We've broken down the entire redesign process into 10 crucial stages, each packed with actionable insights and practical details. From initial performance audits and goal setting to technical planning, QA, and a flawless launch strategy, this checklist ensures your new digital presence is built on a solid foundation. We'll cover everything you need to know to ensure your redesigned website not only looks modern and professional but, more importantly, performs exceptionally well, drives conversions, and supports your long-term business goals. Let's dive in and build a successful path forward, one checkmark at a time.
1. Audit Current Website Performance & Analytics
Before you can build a better website, you must understand what’s wrong with the current one. A comprehensive audit of your existing site’s performance and analytics is the crucial first step in any successful website redesign checklist. This process moves your team from making decisions based on assumptions to making them based on verifiable user data and behavior. It establishes a quantitative and qualitative baseline, ensuring the new design solves real problems and achieves measurable improvements.

This foundational audit involves digging deep into analytics platforms like Google Analytics, Matomo, or Mixpanel to uncover how users find and interact with your site. You'll analyze traffic sources, conversion funnels, popular pages, and high-exit-rate pages to identify friction points and opportunities. For instance, Slack’s 2019 redesign was heavily influenced by data analysis showing where users struggled with the interface, directly informing their streamlined navigation and simplified user experience.
Why It Matters
Ignoring this step is like building a house without surveying the land. You risk investing significant resources into a redesign that fails to address core usability issues, doesn't improve conversions, or even alienates your existing user base. A data-driven approach ensures every design and development decision is purposeful. If your analytics show 70% of traffic comes from mobile but your mobile bounce rate is 85%, you have a clear mandate: prioritize a mobile-first design.
How to Implement It
- Gather Quantitative Data: Pull reports on traffic sources, user demographics, session duration, bounce rates, and conversion rates. Track this data for at least three to six months to identify clear patterns and avoid seasonal anomalies.
- Analyze User Flow: Use user flow reports to see the exact paths visitors take. Identify where they drop off in key funnels, such as checkout or sign-up processes.
- Collect Qualitative Feedback: Review the top 10 most common complaints or questions from customer support tickets and live chat logs. This provides direct insight into user frustrations.
- Establish Technical Baselines: Run your current site through tools like Google PageSpeed Insights and GTmetrix. Document your Core Web Vitals and load times to set clear performance improvement goals.
Key Insight: The goal isn't just to collect data, but to synthesize it into actionable insights. Translate metrics into user stories and design priorities. For example, a high bounce rate on a key landing page isn't just a number; it's a story about mismatched user expectations or a confusing call-to-action.
For a deeper dive into this initial phase, you can discover more about how to analyze your website traffic to set a solid foundation for your redesign project.
2. Define Clear Goals & Key Performance Indicators (KPIs)
Once you understand your current website's performance, the next critical step is to define what success looks like for the new one. A redesign without clear objectives is just a cosmetic update, not a strategic business move. This phase involves setting specific, measurable, achievable, relevant, and time-bound (SMART) goals that directly align with your broader business objectives. Establishing these key performance indicators (KPIs) from the outset transforms the project from a subjective exercise into a results-driven initiative.
This process forces stakeholders from different departments to agree on a unified vision. For instance, Buffer famously redesigned its landing page with the explicit goal of improving the conversion rate from 2% to 7%, a metric that guided every design and copy decision. Similarly, Dropbox's redesign focused on a user-centric KPI: reducing signup friction. By defining these targets, you create a framework for making decisions and, most importantly, for measuring the redesign’s return on investment.
Why It Matters
Without predefined goals, you have no objective way to determine if the redesign was successful. Stakeholder opinions become the measure of success, leading to endless debates and subjective feedback. Clear KPIs provide a shared language and a North Star for the entire project team, from designers to developers. If a primary goal is to increase mobile conversions by 30%, any proposed feature or design element can be evaluated against its contribution to that specific objective.
How to Implement It
- Involve All Stakeholders: Host a workshop with leaders from marketing, sales, product, and customer support to gather diverse perspectives and ensure alignment with company-wide priorities.
- Balance Business and User Goals: A great website serves both the business and the user. Pair a business KPI (e.g., increase lead generation by 25%) with a user-centric one (e.g., decrease form completion time by 40%).
- Create a Measurement Dashboard: Before starting the redesign, build a dashboard in your analytics tool to track your current baseline for each KPI. This provides a clear "before" picture to compare against post-launch results.
- Set Realistic Targets: Use your baseline data and industry benchmarks to set ambitious yet achievable targets. Plan to evaluate performance against these KPIs over a three to six-month period after launch.
Key Insight: Your goals should dictate the design, not the other way around. If your primary goal is to generate more qualified leads, the design must prioritize clear calls-to-action, streamlined forms, and trust-building content, rather than focusing solely on aesthetics.
3. Conduct User Research & Competitor Analysis
While analytics tell you what users are doing, qualitative research reveals why they are doing it. Conducting thorough user research and competitor analysis is an essential part of any website redesign checklist because it grounds your project in human-centered insights and market realities. This dual approach ensures your new design not only solves real user problems but also positions your brand effectively within your competitive landscape.

This process involves gathering direct feedback from your target audience through methods like interviews, surveys, and usability tests on your current site. Simultaneously, you’ll deconstruct competitors' websites to identify industry standards, innovative features, and potential gaps you can exploit. For example, Microsoft’s redesign from Windows 8 to 10 was heavily informed by extensive user feedback sessions that highlighted a strong preference for the classic Start Menu, a feature they prominently restored.
Why It Matters
Skipping this step means designing in a vacuum. You risk building features nobody wants or creating a user experience that feels disconnected from your audience's expectations and mental models. User research prevents costly assumptions, while competitor analysis ensures you don’t just meet industry standards but strategically surpass them. Understanding user needs and market context provides a clear roadmap for a design that resonates and converts.
How to Implement It
- Recruit Your Audience: Identify and recruit 15-20 participants who represent your key user segments. Use existing customer lists, social media channels, or user-testing platforms.
- Conduct User Interviews: Use open-ended questions like "Tell me about the last time you tried to..." to uncover unexpected pain points and motivations. Record sessions (with permission) for later analysis.
- Analyze Competitors Systematically: Evaluate 5-10 direct and indirect competitors. Analyze their site structure, user flow for key tasks (like signing up or purchasing), value proposition, and visual language.
- Synthesize Your Findings: Look for recurring patterns and themes in your research. Create user personas and journey maps to document findings and present them to stakeholders with quotes and video clips for greater impact.
Key Insight: The most powerful insights often come from observing users, not just listening to them. A usability test where a user struggles silently with your navigation is far more telling than a survey response that says the site is "a little confusing."
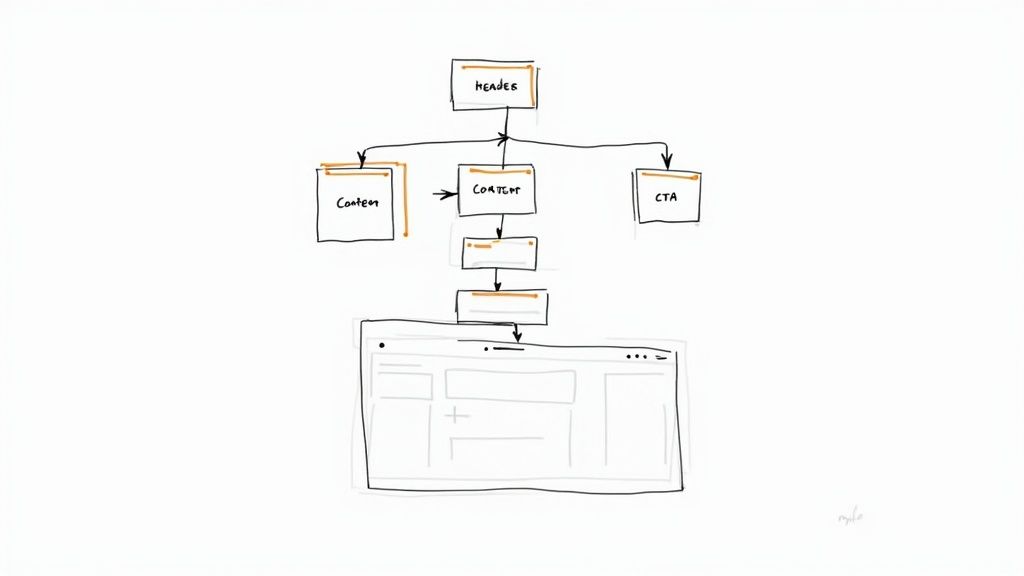
4. Create Wireframes & Information Architecture
Once you have defined your goals and audited your existing site, the next step in your website redesign checklist is to build the blueprint. Creating wireframes and establishing a clear information architecture (IA) bridges the gap between abstract strategy and tangible visual design. This phase focuses on structuring content and user pathways logically, ensuring the new site’s foundation is solid before a single pixel of color is added. It’s about mapping out the user journey and page layouts in a low-fidelity, functional way.
This structural planning is where usability takes shape. Wireframes are skeletal outlines of each page, showing the hierarchy of information, key functional elements, and how users will navigate. For instance, Medium’s redesign focused heavily on a cleaner content hierarchy through meticulous wireframing, which directly improved readability and user engagement. Similarly, Airbnb restructured its IA to prioritize the search and booking flow, a decision rooted in wireframe-level user journey mapping.
Why It Matters
Skipping this stage is like starting construction without architectural plans. It leads to disorganized content, confusing user flows, and costly revisions during the high-fidelity design or development phases. A well-defined IA and thoughtful wireframes ensure that the site is intuitive and that every piece of content has a purpose and a logical home. This preemptively solves usability problems and aligns all stakeholders on the site's structure before investing heavily in visual aesthetics.
How to Implement It
- Map Your Information Architecture: Start by creating a sitemap or a flow chart that outlines all pages and their relationships. This visualizes the site's structure and ensures no critical pages are missed.
- Sketch Low-Fidelity Wireframes: Begin with simple pen-and-paper or whiteboard sketches. The goal is to rapidly explore layout ideas for key pages (homepage, service pages, contact) without getting bogged down by design details.
- Design for Mobile-First: Create your wireframes for the smallest screen first and then adapt the layout for tablet and desktop. This forces you to prioritize the most critical content and functionality.
- Test and Validate: Share your wireframes with 5 to 10 real users. Ask them to complete specific tasks to see if the navigation and layout are intuitive. This early feedback is invaluable for catching structural issues.
Key Insight: Wireframes are a communication tool, not a final design. They should be simple, grayscale, and focused purely on structure, content hierarchy, and functionality. Their primary purpose is to facilitate discussion and validate the user experience foundation before committing to visual design.
For a comprehensive guide on building your site's blueprint, you can learn more about how to create wireframes for your project and ensure a user-centric structure.
5. Develop Visual Design & Brand Guidelines
Once your strategic goals are set, you can begin crafting the visual language of your new website. This stage involves creating comprehensive design and brand guidelines that define your site's aesthetic, from color palettes and typography to imagery styles and UI components. This process translates your brand's personality into a tangible, consistent visual experience, ensuring every element feels intentional and cohesive. It's about building a design system, not just a single page layout.
This foundational work ensures that the redesign is not only beautiful but also scalable and consistent with your overall brand identity. For example, Google's Material Design and Shopify's Polaris are not just style guides; they are complete systems that provide principles, components, and tools to build high-quality digital experiences. By documenting every visual choice, you create a single source of truth that guides designers and developers throughout the project and beyond.
Why It Matters
Skipping this step leads to an inconsistent and disjointed user experience where every new page feels like it belongs to a different website. Without clear guidelines, design decisions become subjective and inefficient, causing delays and endless revisions. A well-documented visual language accelerates the development process, simplifies onboarding for new team members, and strengthens brand recognition. It ensures that your website redesign checklist results in a product that is both visually compelling and operationally efficient.
How to Implement It
- Audit Your Current Brand: Review existing brand assets to identify visual elements that are still effective and those that need updating. This ensures the new design feels like an evolution, not a complete departure.
- Define Your Visual Identity: Use tools like Adobe Color to create a primary and secondary color palette, ensuring combinations meet accessibility standards. Select a maximum of two to three font families for clear typographic hierarchy.
- Create a Component Library: Design and document every UI element, including buttons, forms, and cards. Specify all states, such as hover, active, and disabled, to ensure predictable user interactions.
- Establish Imagery and Iconography Guidelines: Define the style for all visual media, whether it's photography, illustrations, or custom icons. This creates a unified aesthetic across the entire site.
Key Insight: A design system is a living document. It should be built from day one with reusability in mind and be flexible enough to evolve with your brand. Think of it as a product, not a project, that will serve your organization long after the redesign is complete.
6. Design High-Fidelity Mockups & Prototypes
With a solid brand identity and structural wireframes in place, the next crucial step is to breathe life into them with high-fidelity mockups and interactive prototypes. This phase translates the abstract blueprint into a detailed, pixel-perfect visual representation of the final website. It moves beyond basic layouts to incorporate your actual color palette, typography, imagery, and branding, creating a realistic preview that stakeholders can see and interact with before a single line of code is written.
This process involves using design tools like Figma or Sketch to build out every page and component with meticulous detail. It’s where your team finalizes the look and feel, ensuring the design is not only visually appealing but also fully aligned with the project's goals. For example, Airbnb's redesign process heavily relied on detailed prototypes to test and refine the mobile booking journey, ensuring the user flow was intuitive and seamless before committing to development.
Why It Matters
Skipping straight from wireframes to development is a recipe for scope creep, endless revisions, and budget overruns. High-fidelity prototypes serve as the definitive "source of truth" for both designers and developers. They eliminate ambiguity, allowing developers to see exactly how components should look, feel, and behave. More importantly, they enable early-stage user testing, where you can identify and fix critical usability issues when the cost of change is lowest.
How to Implement It
- Use Real Content: Populate your designs with actual copy and images instead of "Lorem Ipsum" and placeholder boxes. This reveals how the design truly functions with real-world content constraints.
- Design All States: Go beyond the "happy path." Design mockups for all possible page states, including empty states, loading indicators, success messages, and error notifications.
- Build Interactive Prototypes: Link your mockups together to create clickable prototypes. This allows you to test key user flows, like the sign-up process or checkout sequence, with real users to gather valuable feedback.
- Specify Interactions: Document hover effects, focus states for accessibility, button-press feedback, and transition animations. This provides developers with a clear guide for implementation.
Key Insight: A high-fidelity prototype is more than just a pretty picture; it's a functional specification. It forces your team to solve complex design problems and make critical decisions early, dramatically reducing misunderstandings and costly rework during the development phase of your website redesign checklist.
7. Conduct Usability Testing & Gather Feedback
Even the most data-informed design concepts are still assumptions until they are validated by real users. Conducting usability testing on your prototypes and mockups is the step where you expose your new design to the unforgiving reality of human interaction. This process involves observing actual users as they attempt to complete tasks on your proposed design, providing invaluable feedback before a single line of code is written. It’s the ultimate check to ensure your redesign is intuitive, efficient, and user-friendly.
This crucial phase moves your design from theory to practice. By testing with real people who represent your target audience, you can identify confusing navigation, unclear calls-to-action, and other friction points that your internal team might overlook. For example, tech giants like Apple and Microsoft famously run thousands of user tests on hardware and software prototypes, using the direct feedback to refine everything from button placement to entire user flows, ensuring their final products are as intuitive as possible.
Why It Matters
Skipping usability testing is a high-stakes gamble. You risk investing your entire development budget into building a website that users find frustrating or difficult to use, leading to poor adoption, high bounce rates, and failed business goals. Early testing allows you to catch and fix these critical flaws when they are still cheap and easy to correct. It ensures the final product doesn't just look good but actually works for the people it was built for.
How to Implement It
- Recruit Representative Users: Find 5-10 participants per testing round who match your target user personas. You don't need a huge sample size to uncover the most significant issues.
- Create Realistic Scenarios: Develop task-based scenarios for users to complete, such as "Find information about pricing and sign up for a free trial." This tests the design in the context of real user goals.
- Use the "Think-Aloud" Protocol: Encourage participants to verbalize their thoughts, feelings, and frustrations as they navigate the prototype. This provides direct insight into their decision-making process.
- Test Across Devices: Ensure your testing includes a mix of desktop, tablet, and mobile users to validate the responsive design and identify device-specific usability problems.
- Iterate Based on Findings: Document and prioritize the issues you uncover based on their frequency and severity. Implement fixes in the design, and then run another round of testing to validate the improvements.
Key Insight: The goal of usability testing isn't to ask users if they like the design. It's to observe whether they can use it effectively to accomplish their goals. Focus on behavior over opinion to gather the most actionable feedback.
8. Prepare Content & SEO Optimization
A visually stunning redesign will fall flat if it isn't discoverable or if the content fails to engage users. Preparing your content and optimizing for search engines is a non-negotiable step in any modern website redesign checklist. This process involves auditing, creating, and refining all website copy to ensure it is clear, valuable, and structured for both human readability and search engine crawlers. It’s about merging a compelling narrative with technical precision to preserve and enhance your organic visibility.
This dual focus on content and SEO ensures your new site doesn't just look better but performs better. You'll conduct keyword research, update metadata, optimize images, and map out a solid internal linking strategy. For example, when Moz reorganized its content structure, it didn’t just change the layout; it strategically improved its information architecture for SEO, resulting in a significant boost in organic traffic. Similarly, HubSpot's redesign heavily focused on SEO optimization, contributing to a massive 40% increase in traffic.
Why It Matters
Launching a redesign without a content and SEO plan is like throwing a party without sending invitations. You risk losing years of accumulated search engine equity, causing a catastrophic drop in traffic and leads. Properly managed, a redesign is a golden opportunity to fix old SEO issues, target more valuable keywords, and build a stronger content foundation. Failing to plan for 301 redirects for changed URLs, for instance, can lead to countless broken links and a severe penalty from search engines.
How to Implement It
- Audit and Map Content: Create a spreadsheet of all existing URLs. Decide whether to keep, improve, or remove each piece of content. Map old URLs to their new counterparts for redirects.
- Conduct Keyword Research: Identify the primary and secondary keywords for each page of the new site. Beyond basic research, understanding how to build an effective keyword list is crucial for targeting the right audience.
- Optimize On-Page Elements: Write unique, compelling meta titles and descriptions for every page. Use a clear heading hierarchy (H1, H2, H3) and add descriptive alt text to all images.
- Plan Your 301 Redirects: Before launch, create a comprehensive map of all URL changes. This is critical for passing link equity from old pages to new ones and preventing 404 errors.
Key Insight: Content and SEO are not separate tasks to be checked off; they are deeply intertwined. Great content that isn't optimized won't be found, and great optimization without quality content won't convert. The best results come from a strategy where content creation and SEO best practices inform each other from the very beginning.
To build a robust strategy that drives visitors, you can explore more techniques on how to increase organic traffic for your newly redesigned website.
9. Develop Frontend & Backend Implementation
This is where your static designs, prototypes, and strategic plans are transformed into a living, functional website. The development phase involves two parallel tracks: frontend developers use HTML, CSS, and JavaScript to build the visual, interactive elements that users see, while backend developers build the server-side logic, databases, and APIs that power the site's functionality. This crucial stage in the website redesign checklist bridges the gap between vision and reality.
This collaborative process ensures that the approved user interface is not only visually accurate but also performs smoothly and reliably. For instance, when Airbnb rebuilt its platform using React, it wasn't just a cosmetic update. The technical implementation was a strategic decision to enhance performance and create a more dynamic user experience, demonstrating how development choices directly impact business goals.
Why It Matters
A flawed development process can undermine even the best design and strategy. Poorly written code can lead to slow load times, security vulnerabilities, browser compatibility issues, and a frustrating user experience that drives visitors away. A disciplined implementation ensures the final product is scalable, secure, and maintainable, preventing costly technical debt down the line. It’s the difference between a website that simply looks good and one that works flawlessly.
How to Implement It
- Establish a Staging Environment: Create a replica of your live server environment for development and testing. This allows you to deploy and test code without affecting your current website.
- Use Version Control: Implement Git from day one. This tracks all code changes, facilitates collaboration among developers, and makes it easy to roll back to a previous version if something breaks.
- Break Work into Sprints: Adopt an agile methodology, breaking the development process into manageable two-week sprints. Each sprint should have clear goals and end with a review of the work completed.
- Implement CI/CD Pipelines: Set up Continuous Integration/Continuous Deployment (CI/CD) to automate the testing and deployment process. This speeds up development cycles and reduces the risk of human error.
- Conduct Regular Code Reviews: Have developers review each other’s code before it’s merged into the main branch. This practice improves code quality, catches bugs early, and encourages knowledge sharing.
Key Insight: The handover from design to development is a critical friction point. Maintain constant communication between designers and developers to clarify ambiguities and ensure the final implementation perfectly matches the approved specifications and user experience goals.
10. Test, QA, & Launch Strategy
A beautiful design and powerful features are meaningless if the website breaks under pressure. Comprehensive Quality Assurance (QA) testing and a meticulous launch strategy are the final, non-negotiable steps in any website redesign checklist. This phase transitions your project from a development environment to a live, production-ready asset, ensuring a smooth, error-free experience for your users from day one. It is your ultimate safeguard against brand-damaging bugs, performance bottlenecks, and launch-day disasters.
This critical stage involves systematically testing every component of the new site across various environments to identify and fix issues before they impact users. It also requires planning the deployment meticulously to minimize downtime and have contingency plans ready. Tech giants like Meta use canary deployments, rolling out new features to a small percentage of users first to monitor for issues before a full release, a strategy that mitigates risk by limiting the blast radius of any potential bugs.
Why It Matters
Skipping or rushing this step is a direct path to failure. A buggy launch can immediately erode user trust, harm your SEO rankings, and lead to lost revenue. Imagine launching an e-commerce redesign only to find the checkout process is broken on Safari, or your new lead generation form doesn’t submit on mobile devices. A robust QA and launch plan ensures functionality, performance, and accessibility standards are met, protecting your investment and delivering a positive user experience.
How to Implement It
- Conduct Multi-Environment Testing: Test on actual mobile devices and desktops, not just emulators. Verify functionality across major browsers like Chrome, Firefox, Safari, and Edge.
- Verify Key User Journeys: Create test scripts for critical user paths, such as signing up for a newsletter, completing a purchase, or filling out a contact form. Test both common scenarios and edge cases.
- Validate Integrations and Accessibility: Confirm all third-party integrations (e.g., CRM, payment gateways) work flawlessly. Use screen readers like NVDA or JAWS to test for accessibility compliance.
- Plan a Phased Rollout: If possible, plan a staged launch (e.g., 10% → 50% → 100% of traffic) to monitor performance in a live environment with a limited audience. Prepare a rollback plan to quickly revert to the old site if a critical issue arises.
- Establish Launch-Day Protocols: Schedule the launch during a low-traffic period. Set up a "war room" (physical or virtual) with all key stakeholders for real-time communication and decision-making.
Key Insight: Your launch isn't the finish line; it’s the starting line for the new website's life. A successful launch is defined not by the absence of problems, but by the team's preparedness to identify and resolve them swiftly with pre-defined processes and monitoring in place.
10-Step Website Redesign Comparison
| Item | 🔄 Implementation complexity | ⚡ Resource requirements | 📊 Expected outcomes | 💡 Ideal use cases | ⭐ Key advantages |
|---|---|---|---|---|---|
| Audit Current Website Performance & Analytics | Medium — analytics setup & expert analysis | Moderate — analytics/heatmap tools + analyst time (3–6 mo data) | Baseline metrics, UX bottlenecks, data-driven priorities | Pre-redesign discovery; justify investment | Evidence-based decisions; measurable baseline |
| Define Clear Goals & Key Performance Indicators (KPIs) | Low–Medium — stakeholder alignment & goal framing | Low — workshops, dashboarding tools, stakeholder time | Measurable objectives; reduced scope creep | Align teams before design/development | Clear direction; objective success metrics |
| Conduct User Research & Competitor Analysis | High — recruiting, multiple research methods, synthesis | High — researchers, participants, testing tools | User insights, personas, competitive opportunities | User-centered redesigns; market repositioning | Reduces design risk; uncovers unmet needs |
| Create Wireframes & Information Architecture | Medium — structure content and flows, iterate | Low–Moderate — designers, collaboration tools | Clear content hierarchy and validated page structures | Early layout & navigation validation (mobile-first) | Prevents structural rework; fast iteration |
| Develop Visual Design & Brand Guidelines | Medium–High — design system and asset creation | High — senior designers, asset production, tooling | Cohesive visual identity and reusable components | Brand refreshes; scalable product design | Consistency at scale; speeds development |
| Design High-Fidelity Mockups & Prototypes | High — pixel-perfect screens and interaction mapping | High — experienced designers, prototyping tools | Realistic prototypes for testing and dev handoff | Final design validation; complex interaction flows | Reduces dev ambiguity; realistic usability testing |
| Conduct Usability Testing & Gather Feedback | High — test planning, moderation, analysis | Moderate–High — participants, researchers, testing platforms | Identified usability issues and prioritized fixes | Validate prototypes before implementation | Prevents costly post-launch changes; stakeholder buy-in |
| Prepare Content & SEO Optimization | Medium — audits, keyword mapping, redirect planning | Moderate — writers, SEO tools, migration resources | Maintained/improved organic traffic and clarity | SEO-sensitive redesigns; large content migrations | Preserves rankings; improves discoverability |
| Develop Frontend & Backend Implementation | Very High — coding, integration, performance & security | Very High — developers, infra, CI/CD, QA | Fully functional, performant, and secure website | Full rebuilds or feature-rich platforms | Enables scalability and complete feature set |
| Test, QA, & Launch Strategy | High — cross-browser/device, security, rollback plans | High — QA engineers, monitoring, support teams | Stable launch with monitoring and rollback capability | Major launches, migrations, high-traffic rollouts | Minimizes downtime; reduces post-launch incidents |
From Checklist to Reality: Launching Your New Website
Completing a comprehensive website redesign checklist is a monumental achievement. You've navigated the intricate stages of auditing, goal-setting, design, development, and testing. This journey, from initial concept to a fully functional staging environment, represents a massive investment of time, resources, and strategic thinking. But as you stand on the precipice of launch, it's crucial to understand that crossing the finish line is not the end of the race; it's the start of a new, more dynamic one. The true value of your meticulous preparation is realized in the post-launch phase, where data-driven iteration begins.
The process you’ve just reviewed transforms a redesign from a speculative art project into a calculated business investment. By grounding every decision in data, from your initial analytics audit to your final user acceptance testing, you’ve built more than just a new digital storefront. You've engineered a growth engine, a powerful tool for attracting, engaging, and converting your target audience. This structured approach ensures your new site isn’t just visually appealing but is also strategically aligned with your core business objectives, ready to deliver measurable returns.
Your Final Pre-Launch Sanity Check
Before you push the big red button, take a moment to reflect on the core pillars of this entire process. These are the non-negotiable elements that separate a successful launch from a problematic one.
- Goal Alignment: Does the finished product directly address the KPIs you defined at the very beginning? If your goal was to increase lead generation by 20%, are the CTAs, forms, and user flows optimized for that specific outcome?
- SEO Preservation: Have you implemented every 301 redirect, triple-checked your XML sitemap, and ensured your new
robots.txtfile isn't accidentally blocking search engine crawlers? A slip-up here can erase months of SEO progress overnight. - Technical Readiness: Is your hosting environment prepared for the expected traffic? Are all third-party integrations (like your CRM, marketing automation, or analytics tools) firing correctly? A successful launch is an invisible one, where everything just works.
Think of this checklist not as a rigid set of rules, but as a framework for risk mitigation. Every item you've ticked off has systematically reduced the potential for post-launch surprises, protecting your investment and ensuring a smooth transition for your users.
The Next Chapter: Monitor, Measure, and Iterate
The days and weeks following your launch are arguably the most critical. Your new website is now a living entity, interacting with real users and generating a wealth of new data. This is where your commitment to continuous improvement truly begins.
Your immediate post-launch priorities should include:
- Intensive Monitoring: Keep a close eye on your analytics platforms. Watch for any sudden drops in traffic, spikes in 404 errors, or unusual user behavior patterns. Tools like Google Analytics, Search Console, and application performance monitoring (APM) systems are your new best friends.
- Performance Benchmarking: Compare the live site's performance against the goals you set. How are your Core Web Vitals? Is the conversion rate tracking toward your target? Is organic traffic recovering and growing as expected? This is the moment of truth where your hypothesis (the redesign) meets reality (user behavior).
- Feedback Collection: Don't assume silence is a sign of success. Proactively gather feedback through tools like Hotjar, user surveys, or customer support channels. This qualitative data provides the "why" behind the quantitative data you see in your analytics.
A website launch is not a conclusion; it is a new baseline. The exhaustive preparation detailed in this website redesign checklist provides you with a stable, optimized, and measurable starting point from which to build future growth.
Navigating this entire lifecycle, from the initial audit to post-launch iteration, is a complex endeavor. It requires a rare blend of strategic vision, technical expertise, and project management discipline. For startups, SMEs, and even enterprise teams, managing every facet in-house can be daunting. This is where a strategic partnership can be a game-changer. Partnering with a dedicated development team or leveraging nearshore staff augmentation can provide the specialized skills needed to execute flawlessly, ensuring your vision is translated into a high-performing digital asset without derailing your internal teams.
By embracing this structured, checklist-driven approach, you have laid the foundation for a website that does more than just look good. You have built a resilient, user-centric, and data-informed platform poised to evolve with your business and drive meaningful results for years to come. Congratulations on your commitment to excellence; now, the real work of growth begins.